How to Setup Samsung galaxy Note
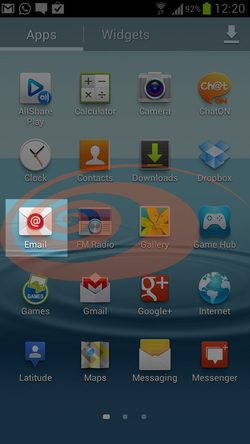
Step 1: Main Screen
On the Main screen, [TOUCH] "Email".
On the Main screen, [TOUCH] "Email".
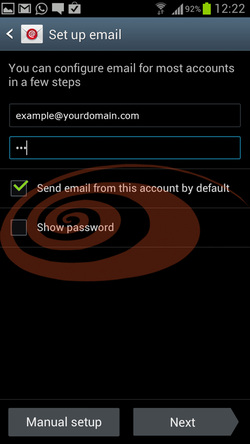
STEP 2 : Setup Email (Manual)
Enter your account information using your keypad.
ENTER:"Your login username".
(Usually it is your email address)
ENTER:"Your account password.".
[TOUCH] "Manual setup".
Enter your account information using your keypad.
ENTER:"Your login username".
(Usually it is your email address)
ENTER:"Your account password.".
[TOUCH] "Manual setup".
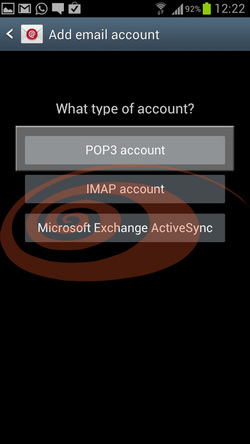
STEP 3: Account Type
[TOUCH] "POP3 account".
[TOUCH] "POP3 account".

STEP 4 : Incoming server settings
Enter your incoming server information using your keypad.
Username:[ENTER] "Your login username".
(Usually it is your email address)
Password:[ENTER] "Your account password.".
POP3 Server:[ENTER] "mail.yourdomain.com".
(yourdomain.com here refers to the domain you have registered)
Security type:[ENTER] "None."
Port:[ENTER] "110."
Delete email fro server:[REMAIN AS] "Never."
[TOUCH] "Next".
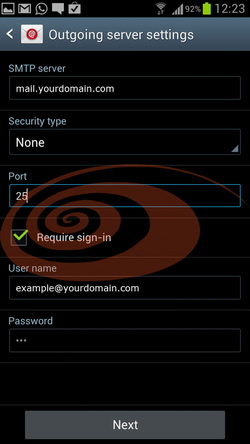
STEP 5 : Outgoing server settings
Enter your outgoing server information using your keypad.
SMTP server:[ENTER] "mail.yourdomain.com".
(yourdomain.com here refers to the domain you have registered)
Security type:[ENTER] "None."
Port:[ENTER] "25."
Require sign-in:[ENABLE]
Username:[ENTER] "Your login username".
(Usually it is your email address)
Password:[ENTER] "Your account password.".
[TOUCH] "Next".
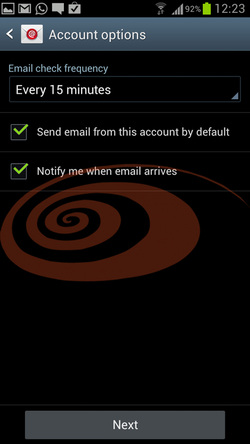
STEP 6 : Account options
Select the options according to your requirement.
[TOUCH] "Next".
Select the options according to your requirement.
[TOUCH] "Next".
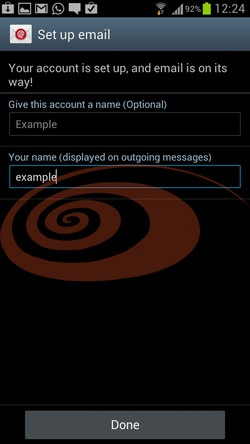
STEP 7 : Set up email
Enter the final information to your account using your keypad.
Give this account a name (Optional):[ENTER] "Your email address".
(This is the easiest way to differentiate between accounts if you have more than 1)
Your name:[ENTER] "Your name as you want it to display on email messages."
[TOUCH] "Done".

The setup is now completed.
You will now be brought to your account "Inbox" and you will see your emails start to appear
(if you do have emails).
You will now be brought to your account "Inbox" and you will see your emails start to appear
(if you do have emails).